

Checking or adding engine oil sounds simple until you actually stand in front of an open hood wondering which cap is the right one, whether the engine is too hot, or why the oil cap refuses to move. A surprising number of drivers either avoid checking their oil completely or accidentally make small mistakes that create expensive problems later. Something as tiny as leaving dirt near the oil opening or forgetting to tighten the cap can lead to leaks, smoke, or engine wear over time.
Modern vehicles may look intimidating under the hood, especially with plastic covers hiding many engine components. The good news is that learning how to safely open the engine oil cap and add oil properly is far easier than most people think. Once you understand the process, it becomes as routine as checking tire pressure or filling windshield washer fluid.
Recent automotive maintenance guidance also stresses the importance of waiting for the engine to cool slightly before opening the oil filler cap. Experts commonly recommend allowing the engine to sit for around 10 to 20 minutes after driving to reduce burn risks and improve oil-level accuracy.
Before diving into the process, let’s build a complete roadmap of what you need to know.
Understanding the Purpose of the Engine Oil Cap
What the Oil Filler Cap Actually Does
The engine oil cap might look like a small plastic lid, but it plays a massive role in keeping your engine healthy. Think of it as the front door to your engine’s lubrication system. Without it, contaminants like dust, dirt, moisture, and debris could easily enter the engine and mix with the oil circulating through delicate internal components. That’s a disaster waiting to happen because modern engines rely on clean oil to reduce friction, control heat, and protect moving metal surfaces.
Most oil filler caps are clearly marked with an oil can symbol or the word “Oil.” Some even include the recommended oil viscosity, such as 5W-30 or 0W-20. Manufacturers do this intentionally because confusing the oil cap with coolant or brake fluid caps can create expensive mistakes. Underneath that cap sits the oil fill opening leading directly into the valve cover area of the engine. When you pour oil there, gravity carries it into the oil pan where it joins the engine’s lubrication system.
A properly functioning oil cap also helps regulate pressure inside the crankcase. Modern engines are carefully sealed systems, and even a loose cap can affect airflow and oil circulation. That’s why mechanics often notice missing or poorly tightened caps immediately during inspections. Drivers sometimes underestimate how much trouble a missing cap can create until they smell burning oil or see smoke rising from the engine bay.
Why the Cap Is More Important Than Most Drivers Realize
Many drivers treat the oil cap like the lid on a water bottle; open it, pour, close, done. In reality, it’s more like the cork in a pressure-sensitive system. A damaged or loose oil cap can allow oil to splatter inside the engine compartment, especially while driving at highway speeds. Reddit users and mechanics regularly report cases where forgotten oil caps caused smoke, oil spray, and engine bay messes after service appointments.
The cap’s rubber gasket or seal is equally important. Over time, heat exposure hardens rubber, making the seal less effective. When that happens, oil vapor can escape, causing leaks or a burnt-oil smell. Some vehicles may even trigger dashboard warning lights if pressure irregularities occur.
It helps to imagine the oil cap as the final piece of a puzzle. Your engine oil system is designed to stay clean, pressurized, and properly ventilated. One missing or damaged cap can interrupt that balance. Thankfully, checking the cap takes only seconds, yet it can prevent hundreds or thousands of dollars in repair costs later.
Related Articles: What Causes an Engine to Run Lean
Locating the Oil Filler Cap Under the Hood
Common Symbols and Labels to Look For
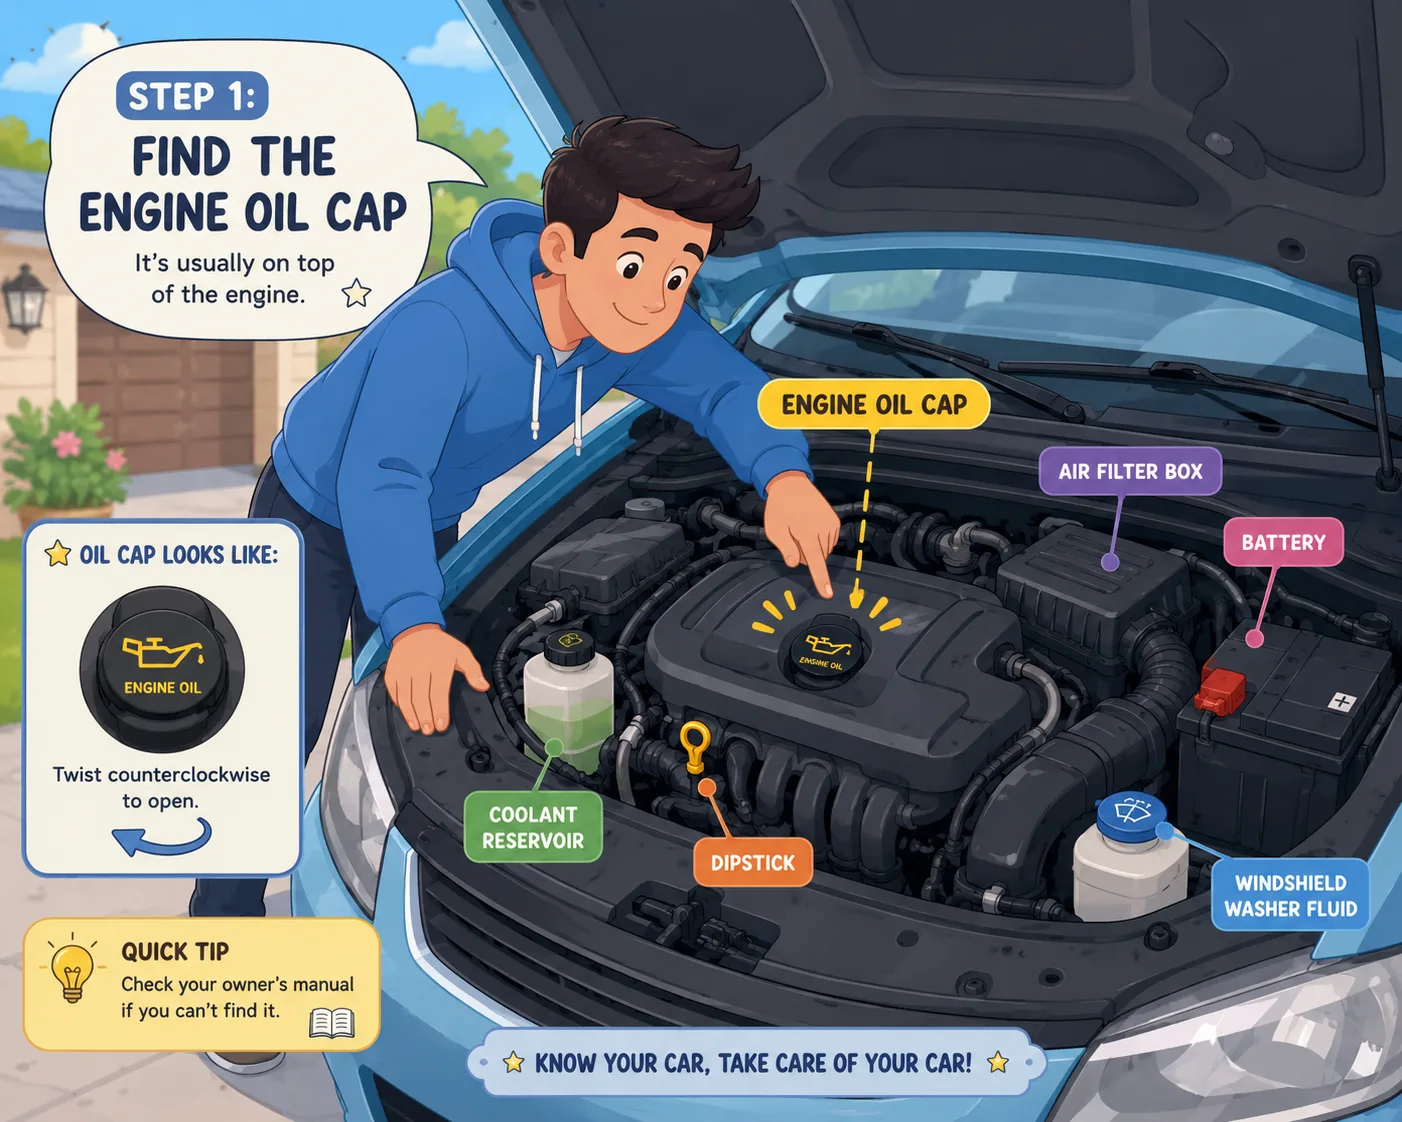
Opening the hood for the first time can feel like staring into a mechanical jungle. Hoses snake across the engine bay, plastic covers hide major components, and several caps compete for your attention. Fortunately, manufacturers make the oil filler cap relatively easy to identify once you know what you’re looking for.
In most vehicles, the oil cap sits on top of the engine and features a small oil can icon. Some caps also include wording such as “Engine Oil” or display the recommended oil type. The cap is usually black or yellow, helping it stand out visually against surrounding engine parts. On many cars, it’s mounted directly on the valve cover near the front or center of the engine.
If you still can’t find it, your owner’s manual becomes your best friend. Automakers include diagrams specifically showing the oil fill location. That’s especially useful for newer engines covered by large decorative plastic shields that conceal the underlying hardware.
Modern engine compartments prioritize compact packaging, so the cap’s exact location varies widely between manufacturers. In inline four-cylinder engines, it’s often easy to spot near the top center. V6 and V8 engines sometimes place the cap toward one side. Diesel engines may have larger filler caps designed for heavier oil flow.
Differences Between Older and Modern Engines
Older cars usually expose the engine completely, making the oil cap visible immediately after opening the hood. Modern vehicles often prioritize aesthetics and noise reduction instead. Large engine covers create a cleaner appearance but sometimes hide essential maintenance points.
That doesn’t mean the process is harder; it just means you may need to remove a decorative cover first. Most snap off using simple clips or a few bolts. If you’re uncertain, never force anything aggressively. A quick glance at the manual or a manufacturer tutorial can save broken plastic tabs and frustration.
Some luxury brands place maintenance labels directly under the hood to guide drivers. Others use brightly colored filler caps to simplify identification. It’s almost like manufacturers know most people don’t enjoy playing “find the oil cap” during maintenance.
Once you locate it the first time, future oil checks become second nature. Your brain develops a mental map of the engine bay, much like learning where light switches are in a new house.
Simple Checks Before Opening the Engine Oil Cap
Parking Position and Engine Shutdown
Before touching the oil cap, preparation matters more than people think. First, park the vehicle on level ground. This sounds minor, but uneven surfaces can produce inaccurate oil readings because oil shifts inside the pan. A sloped driveway may falsely suggest the engine is overfilled or low on oil.
Next, shut the engine off completely. Never attempt to open the oil cap while the engine is actively running. Oil circulates rapidly during operation, and pressure, heat, or splashing can create safety hazards. Mechanics and automotive experts strongly discourage removing the cap on a running engine due to the risk of hot oil spray and inaccurate oil measurements.
After shutting off the engine, engage the parking brake and allow the car to sit briefly. This pause gives oil time to drain back into the oil pan. Think of it like letting coffee grounds settle before pouring the last cup. The oil needs a moment to collect in the proper place for an accurate reading.
Lighting also matters. Poor visibility increases the chances of confusion or spills. If working at night, use a flashlight instead of relying solely on your phone’s dim light.
Checking the Dipstick First
Opening the oil cap without checking the dipstick first is like pouring more water into a glass without checking if it’s already full. Overfilling engine oil can be just as harmful as running low.
Pull the dipstick out carefully, wipe it clean with a lint-free cloth, reinsert it fully, then remove it again to inspect the oil level. Most dipsticks show minimum and maximum markers. The oil level should fall somewhere between those indicators.
Experts note that checking oil immediately after shutting off a hot engine can produce misleading readings because circulating oil hasn’t fully drained into the pan yet. Waiting several minutes improves accuracy significantly.
Also inspect the oil condition itself. Healthy oil usually appears amber to dark brown depending on age. Milky or creamy residue near the cap may indicate condensation or possible coolant contamination, though condensation alone can be normal during cold weather.
Why Engine Temperature Matters During the Process
Risks of Opening the Cap on a Hot Engine
Temperature plays a bigger role than many drivers realize. Engines operate under intense heat, often exceeding 200°F during normal driving. Touching metal surfaces near the oil cap immediately after a drive can burn skin quickly. Even the cap itself may become dangerously hot.
Hot oil also expands and flows differently than cooled oil. Removing the cap too soon after aggressive driving can expose you to splattering oil droplets or vapor. Imagine opening a steaming pressure cooker without caution; that same principle of trapped heat applies here, though on a smaller scale.
Automotive maintenance sources consistently recommend allowing the engine to cool for around 10 to 20 minutes before checking or adding oil. This cooling period dramatically reduces burn risks while improving dipstick accuracy.
Another issue involves overfilling. Hot oil hasn’t fully settled into the oil pan immediately after shutdown, causing inaccurate readings. Drivers may accidentally add too much oil, which can lead to foaming, increased crankcase pressure, or seal damage.
The Ideal Cooling Time Before Adding Oil
So what’s the sweet spot? Warm; not scorching hot; is ideal. Most experts suggest waiting at least 10 minutes after driving. Some prefer closer to 15 or 20 minutes if the vehicle was driven hard or in extremely hot weather.
This short wait offers multiple benefits:
| Benefit | Why It Matters |
|---|---|
| Reduced burn risk | Engine parts cool enough for safer handling |
| Better oil readings | Oil drains fully into the oil pan |
| Cleaner oil filling | Less splashing or vapor |
| Easier cap removal | Heat expansion decreases slightly |
Think of the engine like a cast-iron skillet after cooking. It doesn’t become safe instantly the moment the stove turns off. Giving it time prevents accidents and makes the process smoother.
How to Open the Engine Oil Cap Properly
Standard Twist-Off Caps
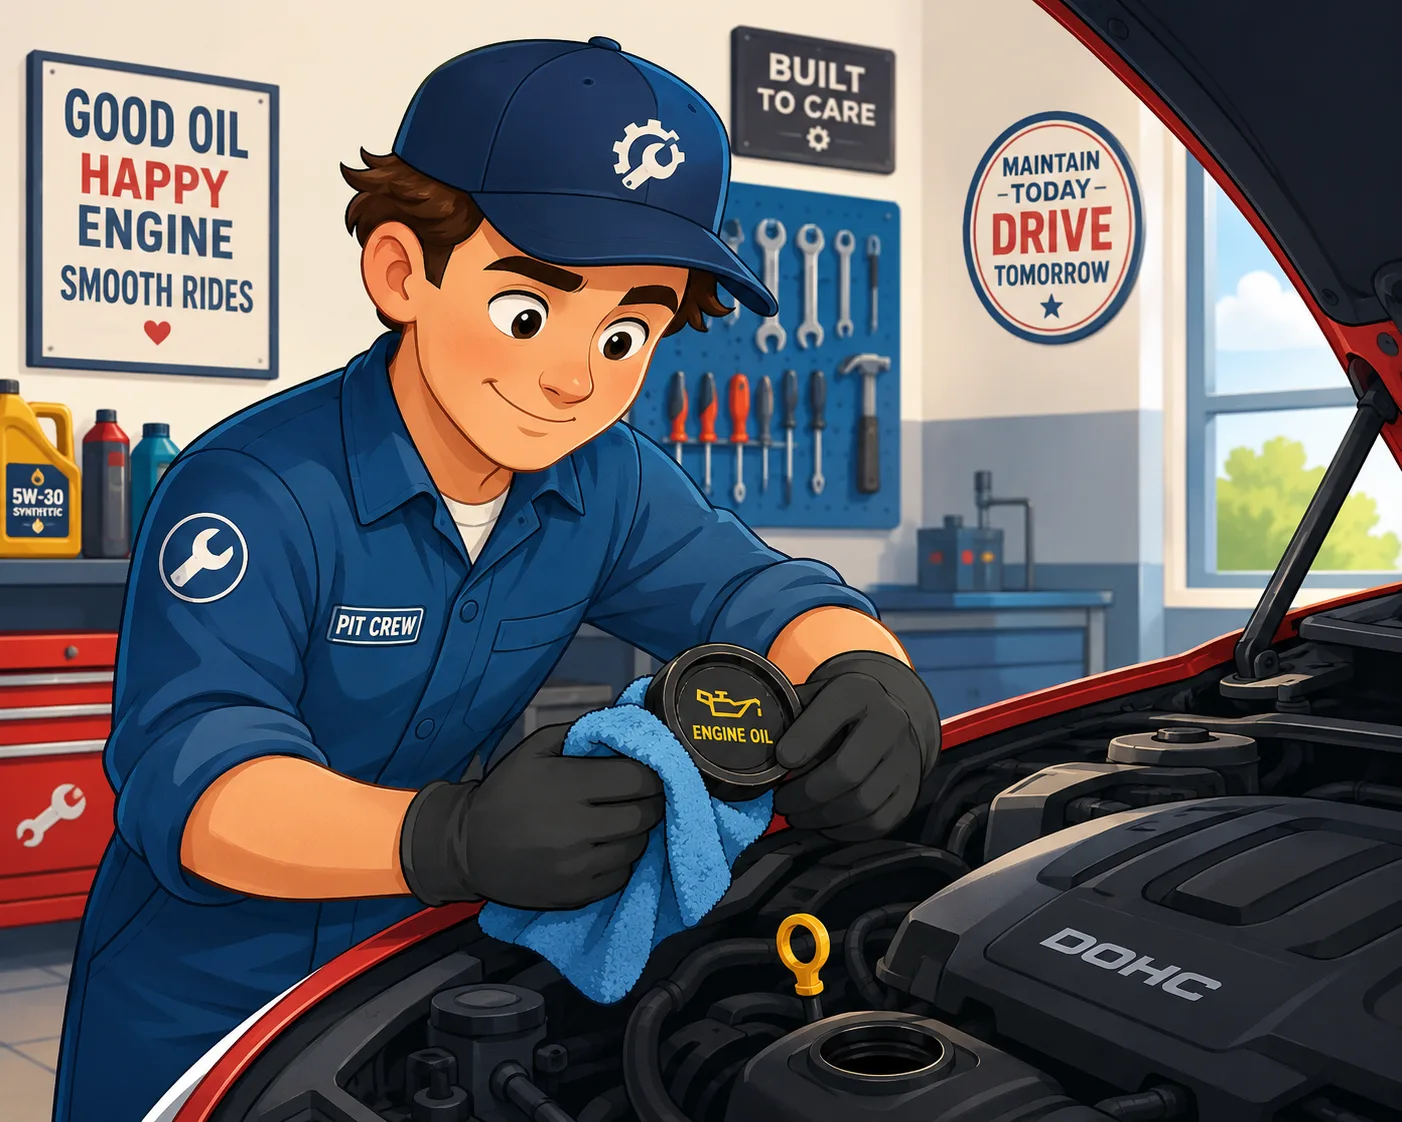
Most engine oil caps use a straightforward twist-off design. Turn the cap counterclockwise slowly until it loosens. If resistance feels normal, continue carefully until the cap lifts free.
Some caps include ratcheting mechanisms or extra seals that make them feel tighter than expected. That’s normal. The important thing is avoiding sudden forceful twisting that could crack plastic components.
As you remove the cap, place it somewhere clean and secure. A dropped cap collecting dirt or gravel is exactly the kind of simple mistake that creates unnecessary headaches later. Some people place the cap upside down on a clean rag to protect the sealing surface.
You may notice a faint vacuum sound or slight oil smell when opening the cap. That’s usually normal. Engines naturally produce heat and vapor during operation.
Explore Further: How Much Air Should Be in a Spare Tire for Safe Driving
Using Gloves or a Rag for Better Grip
If your hands are oily or sweaty, the cap may slip while turning. A shop rag or pair of mechanic’s gloves improves grip dramatically. Rubber gloves also protect against residual heat and grime.
Never use pliers aggressively on a normal cap unless absolutely necessary. Crushing or cracking the plastic creates a new problem instantly. The cap should come off with steady hand pressure under ordinary conditions.
Many experienced mechanics keep microfiber towels nearby specifically for oil service tasks. The towel improves grip while protecting hands from grease and hot surfaces. Sometimes the simplest tools solve the biggest frustrations.
Tips for Removing a Tight or Stuck Cap
What Causes Oil Caps to Stick
Oil caps become stuck for several reasons. Heat cycles constantly expand and contract the plastic and rubber materials. Over-tightening during previous maintenance also contributes heavily. Some people tighten oil caps as if sealing a submarine hatch, when hand-tight is usually sufficient.
Oil residue buildup around the threads can also create stubborn resistance. Dust, grime, and engine heat effectively glue the cap in place over time.
Cold weather sometimes worsens the issue because rubber seals stiffen as temperatures drop. Ironically, caps may feel tighter during winter mornings than after mild engine warming.
Safe Ways to Loosen a Tight Cap
Start with patience rather than brute strength. Use a rubber glove, towel, or rubber jar opener for additional grip. Gentle rocking motions sometimes help break stubborn seals loose without damaging the cap.
If the cap remains immovable, allow the engine to warm slightly; not fully hot; before trying again. Mild warmth can soften rubber seals enough to ease removal.
Avoid using screwdrivers to pry aggressively beneath the cap. That can crack plastic valve covers or distort sealing surfaces. If the cap appears cross-threaded or damaged, replacement may become necessary.
A little caution here goes a long way. Breaking a cap during removal turns a five-minute maintenance task into an inconvenient parts-store trip.
Read Also: How to Get a Stripped Bolt Off a Car
What to Avoid Falling Into the Engine Opening
Dirt, Debris, and Small Objects
Once the cap comes off, the oil fill opening becomes vulnerable. Anything falling inside eventually circulates through the engine’s lubrication system. Dirt particles may sound harmless, but inside an engine they act like microscopic sandpaper.
Common dangers include:
- Dust and grit
- Leaves or insects
- Loose bolts or screws
- Rag fibers
- Plastic fragments
Even small contamination can contribute to premature engine wear over time. Engines operate with incredibly tight internal tolerances, meaning cleanliness matters tremendously.
Why Cleanliness Matters More Than You Think
Imagine undergoing surgery in a dusty room; that’s essentially what contamination does to an engine internally. Oil must remain as clean as possible to protect bearings, pistons, camshafts, and other precision components.
Before removing the cap, wipe surrounding dirt away using a clean cloth. This simple step prevents debris from accidentally falling inward during filling.
Professional mechanics often clean the entire filler area before opening it. It may seem excessive, but they understand how expensive contamination-related damage can become.
How to Add Oil Without Creating a Mess
Choosing the Right Funnel
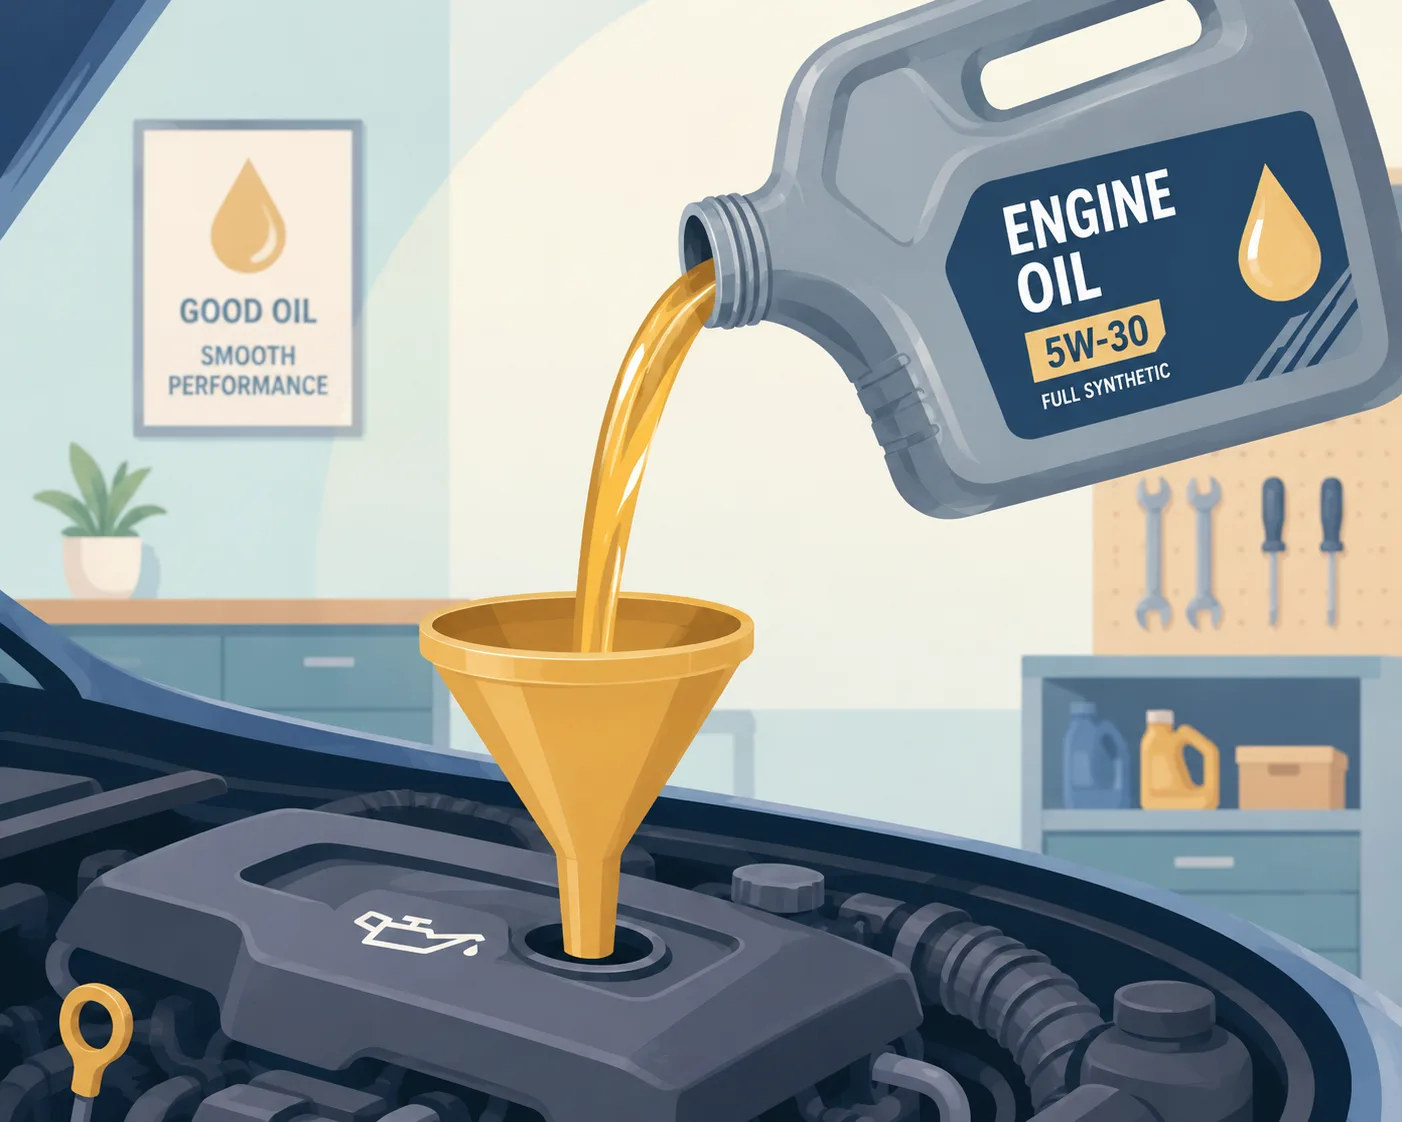
Funnels transform oil filling from a frustrating balancing act into a controlled process. Without one, oil often drips onto engine components, causing smoke or unpleasant burning smells later.
Choose a funnel sized appropriately for the oil fill opening. Narrow-neck funnels work best for compact engines with limited clearance. Flexible funnels help reach awkward filler locations beneath covers or hoses.
A clean funnel matters just as much as the oil itself. Never use a dirty funnel previously exposed to coolant, dirt, or chemicals.
Pouring Slowly and Checking Levels Carefully
Pouring too quickly is one of the most common beginner mistakes. Oil bottles sometimes “glug” unexpectedly, splashing oil everywhere. Slow, steady pouring prevents spills and overfilling.
Add oil gradually, especially if topping off rather than performing a full oil change. Wait briefly after each addition before rechecking the dipstick. Oil takes time to settle.
Here’s a practical approach:
| Step | Action |
|---|---|
| 1 | Insert funnel securely |
| 2 | Pour small amounts slowly |
| 3 | Wait 30–60 seconds |
| 4 | Check dipstick again |
| 5 | Repeat if necessary |
Overfilling can create aerated oil foam, pressure buildup, and seal damage. Underfilling causes lubrication starvation. Precision matters more than speed.
Signs the Oil Cap or Seal May Need Replacement
Visible Cracks and Oil Residue
Oil caps don’t last forever. Constant heat exposure eventually weakens plastic and rubber components. Cracks, warped threads, or hardened seals all indicate replacement may be necessary.
Watch for these warning signs:
- Oil residue around the cap
- Burning oil smells
- Cracked plastic housing
- Loose fitment
- Missing gasket material
These symptoms often develop gradually. Many drivers ignore them until oil visibly leaks across the engine bay.
Symptoms of a Bad Oil Cap Seal
A failing oil cap seal may allow pressure leaks inside the crankcase ventilation system. Some vehicles even trigger check-engine lights if airflow irregularities become severe.
You may also notice:
- Rough idle
- Oil splatter near the valve cover
- Smoke from the engine compartment
- Increased oil consumption
Fortunately, replacement caps are usually inexpensive compared to engine repairs. Replacing a questionable cap early is one of the cheapest preventive maintenance decisions you can make.
Continue Reading: Why Does Your Engine Whine When You Accelerate
Double-Checking Everything Before Closing the Hood
Confirming the Cap Is Tight
Before closing the hood, always confirm the oil cap is fully secured. This final check prevents one of the most embarrassingly common maintenance mistakes; driving away without the cap installed properly.
Mechanics and drivers frequently share stories about forgotten oil caps causing smoke, oil spray, and frightening smells shortly after driving.
Turn the cap clockwise until snug. Avoid excessive tightening, but ensure it seats properly against the seal.
Then inspect surrounding areas for spilled oil. Wipe any residue immediately to prevent smoke or odors when the engine heats up again.
Recommended Post: How to Check Transmission Fluid Nissan Altima Without Missing Key Steps
Final Inspection Before Driving Away
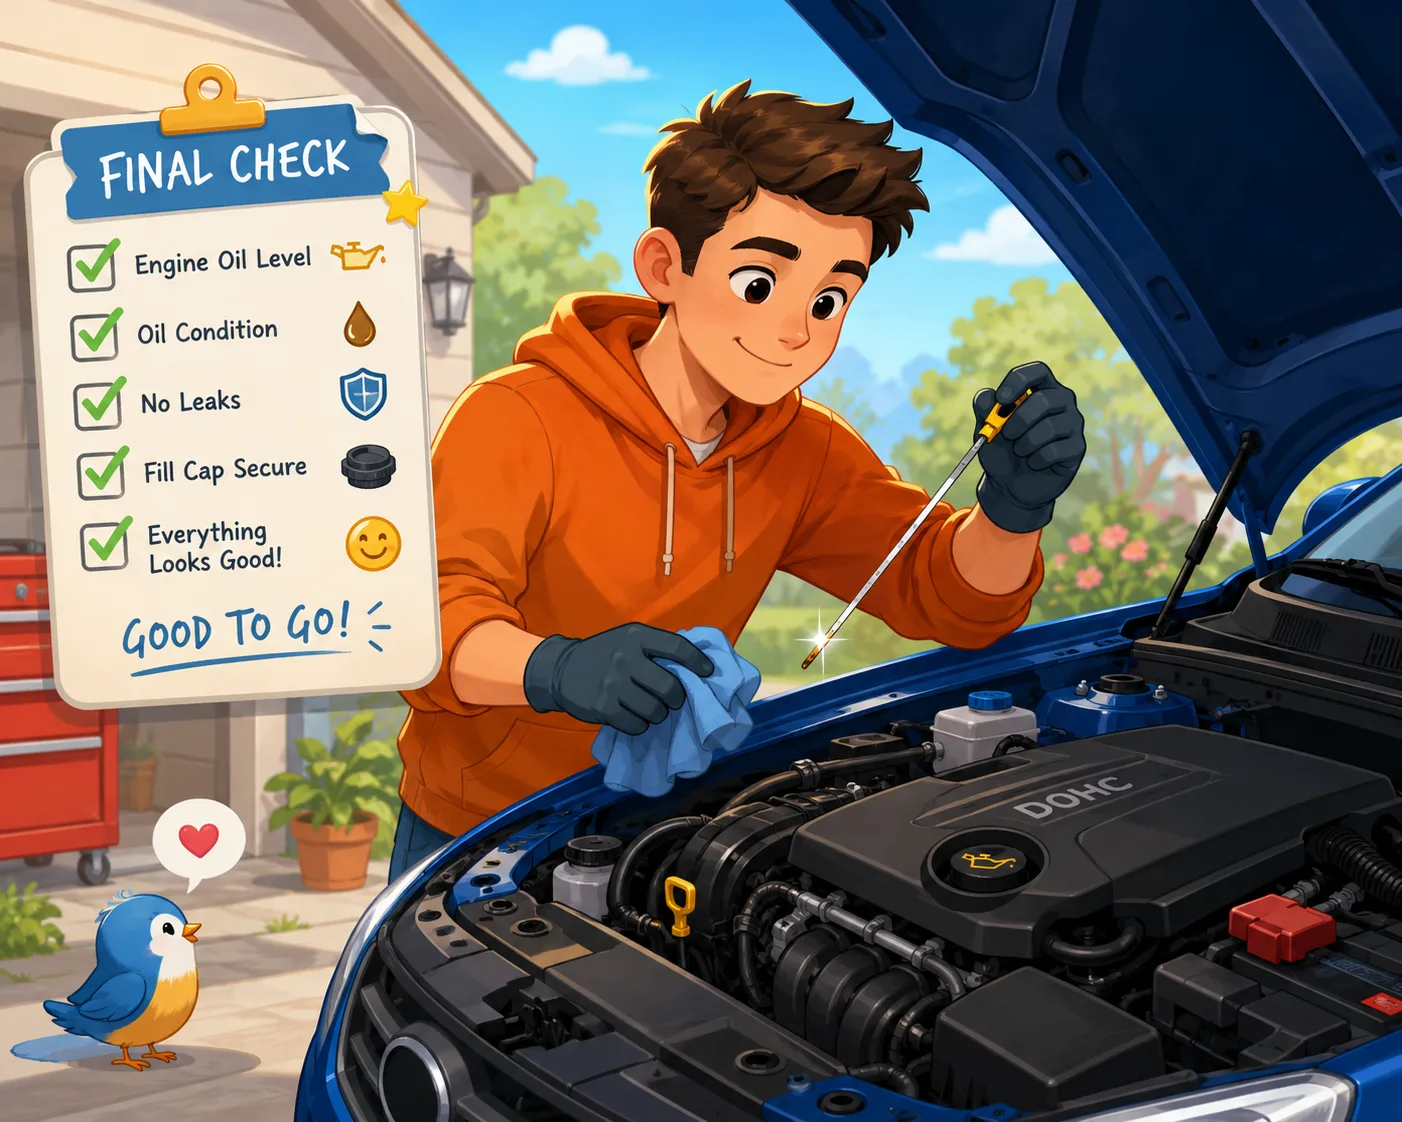
Take thirty extra seconds for a final inspection:
- Funnel removed?
- Dipstick fully inserted?
- Oil cap tightened?
- No tools left behind?
- Hood securely latched?
That quick mental checklist acts like a pilot’s pre-flight inspection. Tiny oversights create big consequences surprisingly often.
Once everything checks out, close the hood firmly and start the engine briefly. Listen for unusual sounds and confirm no warning lights appear. If all looks normal, you’re ready to drive confidently knowing the oil system is sealed and functioning correctly.
Conclusion
Opening the engine oil cap may seem like one of the simplest automotive tasks, but doing it correctly protects both your engine and your safety. From locating the correct filler cap to waiting for proper engine cooling time, every small step contributes to cleaner maintenance and longer engine life.
The process becomes much easier once you understand the rhythm of it: park safely, let the engine cool slightly, check the dipstick, remove the cap carefully, avoid contamination, add oil slowly, and confirm everything is sealed before closing the hood. It’s less about mechanical expertise and more about patience and attention to detail.
Modern engines are incredibly durable when maintained properly. Something as basic as checking oil regularly and handling the oil cap correctly can add years to engine longevity. Think of engine oil as the bloodstream of your car. Keeping that system clean, sealed, and properly filled is one of the smartest habits any driver can develop.
FAQs
1. Can I open the engine oil cap while the engine is running?
No. Opening the oil cap while the engine runs can expose you to hot oil splashes, inaccurate oil readings, and unnecessary safety risks. Always shut the engine off first.
2. How long should I wait before opening the oil cap after driving?
Most automotive experts recommend waiting around 10 to 20 minutes after driving to allow the engine and oil to cool slightly.
3. What happens if I accidentally overfill engine oil?
Too much oil can cause foaming, pressure buildup, seal damage, and reduced engine performance. Always add oil gradually and recheck the dipstick frequently.
4. Why is there white or creamy residue under my oil cap?
This can sometimes be harmless condensation, especially during cold weather. However, persistent milky residue combined with coolant loss may indicate a more serious issue like a head gasket problem.
5. Is it okay to drive with a loose or missing oil cap?
No. A loose or missing oil cap may allow oil to spray out and contaminants to enter the engine. It can also create smoke, burning smells, and potential engine damage if ignored.

Marco Vestri is a 29-year-old American content writer based in Spokane, Washington. He specializes in creating well-researched automotive maintenance guides, troubleshooting articles, and practical ownership advice for everyday drivers. His work emphasizes accuracy, clear explanations, and reliable sources, helping readers make informed decisions with confidence. As a regular contributor to carissues.wiki, Marco combines years of blogging experience with a passion for simplifying complex vehicle topics into useful, trustworthy content for a broad audience.